You strive to gain new customers, right? Regardless of its size, your marketing department works daily to pull in prospects and convert them into clients. Once achieved, the next step involves converting these new clients into loyal brand ambassadors.
Maybe your customer service team will handle your clients from this point. However, a well-designed welcome kit can enhance this transition, boost loyalty, and delight clients.
Nevertheless, careful planning is needed for the new customer intake process. When assembling a new client welcome kit, focus on traits like personalisation, functionality, usefulness, information, and fun. A well-planned welcome kit can impress, but a poorly planned one can harm.
Luckily for you, we’ve put together this guide of welcome kit do’s and don’ts so you have a better understanding of how to tackle this process more efficiently. Read on to find out and get in touch with our experts to get your own new client welcome kit going.
Do’s

Personalisation and customisation are at the heart of successful welcome kits. A pre-prepared standard welcome kit is good, but it needs room for personalisation for each client. Make sure you allocate some of your marketing budget to new client welcome kit personalisation.
The Info
Your new client might have chosen you for specific services. Yet, your company may offer other services that this client might not know about.

To best inform your new client about your brand, such as other services you offer, success stories, experience, your processes, your team, and so forth, use an informative brochure. Make sure you keep this item easy to read, short, and straightforward, otherwise, there’s a big chance no one will read it.
Let your imagination fly and consider delivering this information through other channels, such as a video, website accessed through a QR code, interactive toy or tool, etc.
Welcome Kits Do’s and Dont’s: Tools N ́ Toys
Once you’ve dealt with the informative part of your welcome kit, it’s time to get down to the good stuff. This is your opportunity to surprise and delight your client. Be bold, be original, but be yourself, or better yet, let your brand be itself.
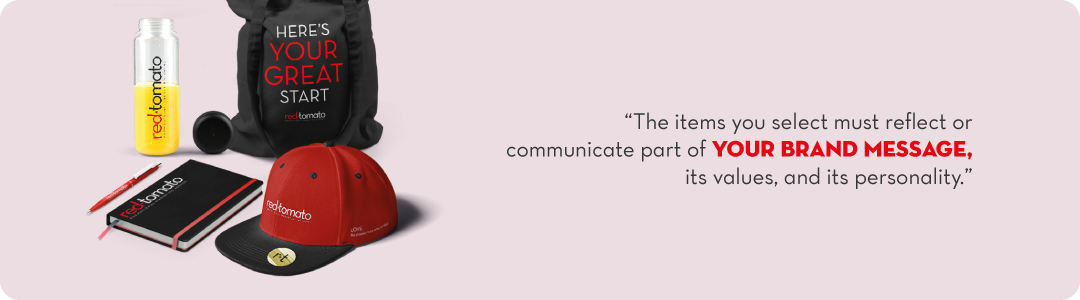
The items you select must reflect or communicate part of your brand message, its values, and its personality. But they also have to connect with your client by being interesting, useful, fun, and something that will be present in their lives for a long time.
Make sure the items in your welcome kit are congruent with the overall message you’re trying to convey and try to look for ways to personalise them for each customer. (Are you ready to start building your own welcome kit? Start here)
The Biggest “Do”
The most important aspect of your welcome kit, and the one that’ll ensure it gets the results you want (loyalty, delight, etc.), is to invest the appropriate amount of resources into it by letting the experts make the process smoother and more efficient.

Don’ts
We’re going to keep the negative section of the “don’ts” short and straight to the point: Don’t be lazy, unoriginal, or petty. If you just assemble a regular old kit with a calendar, a pen, a notebook, or something similarly boring, don’t be surprised if your client isn’t surprised by your kit and forgets about it faster than you can say “welcome”.

There’s nothing wrong with calendars, pens, or notebooks, by the way; if they have the proper justification to be part of a kick-ass kit. (Check out here our list of top products to include in your welcome kit)
Don’t go at it alone!
Don’t go at it alone. Your team might have the best intentions in mind, but allowing a team of dedicated professionals to assist you in creating the perfect welcome kit will take a weight off your shoulders. And you’ll have peace of mind knowing your kit’s success is guaranteed. Let’s START HERE!